Let’s be honest, we’ve all been there. You open the refrigerator door, a wave of chilly, vaguely mysterious air hits you, and you’re met with a chaotic landscape of half-used jars, forgotten leftovers, and vegetables that have seen better days. Figuring out How To Organize A Refrigerator can feel like a daunting task, but it’s one of the most satisfying home projects you can tackle. A well-organized fridge isn’t just about aesthetics; it’s about saving money, reducing food waste, and making your daily routine a whole lot smoother. Think of it as creating a system where your food stays fresher, longer.
Why Bother Organizing Your Fridge Anyway?
Is it really worth the effort? Absolutely. A little bit of strategy goes a long way. When you master the art of fridge organization, you unlock a surprising number of benefits that impact your wallet, your health, and your peace of mind.
- Slash Your Food Waste: When you can see everything you have, you’re far less likely to let that container of strawberries turn into a science experiment in the back. You’ll use what you have before it expires.
- Save Money: Less food waste directly translates to a lower grocery bill. You stop buying duplicates of items you already had but couldn’t find.
- Improve Food Safety: Storing food in its proper place, especially raw meat, is crucial for preventing cross-contamination and the spread of bacteria.
- Faster Meal Prep: Imagine knowing exactly where your ingredients are. An organized fridge makes grabbing what you need for dinner a breeze, turning cooking from a frantic search into a streamlined process.
- Boost Energy Efficiency: When your fridge isn’t overstuffed and air can circulate properly, it doesn’t have to work as hard to stay cool, which can save a little on your energy bill.
Before You Begin: The Great Fridge Empty-Out
You can’t organize clutter. The first step is a clean slate. Set aside about an hour, put on some music, and let’s get it done.
- Empty Everything: Take every single item out of your refrigerator. Yes, everything. Place items on your kitchen counter or in a cooler if you think it will take a while.
- Sort and Purge: This is the moment of truth. Create three piles: Keep, Toss, and Relocate (for things that don’t belong in the fridge, like potatoes or onions). Be ruthless with expired condiments and leftovers of questionable origin. Check expiration dates—when in doubt, throw it out.
- Deep Clean: With the fridge completely empty, give it the spa day it deserves. Remove all the shelves and drawers. Wash them with warm, soapy water. Wipe down the interior walls, ceiling, and floor of the fridge with a food-safe cleaner or a simple solution of vinegar and water.
- Dry Thoroughly: Make sure every surface, shelf, and drawer is completely dry before you put them back in. This prevents mildew and ice buildup.
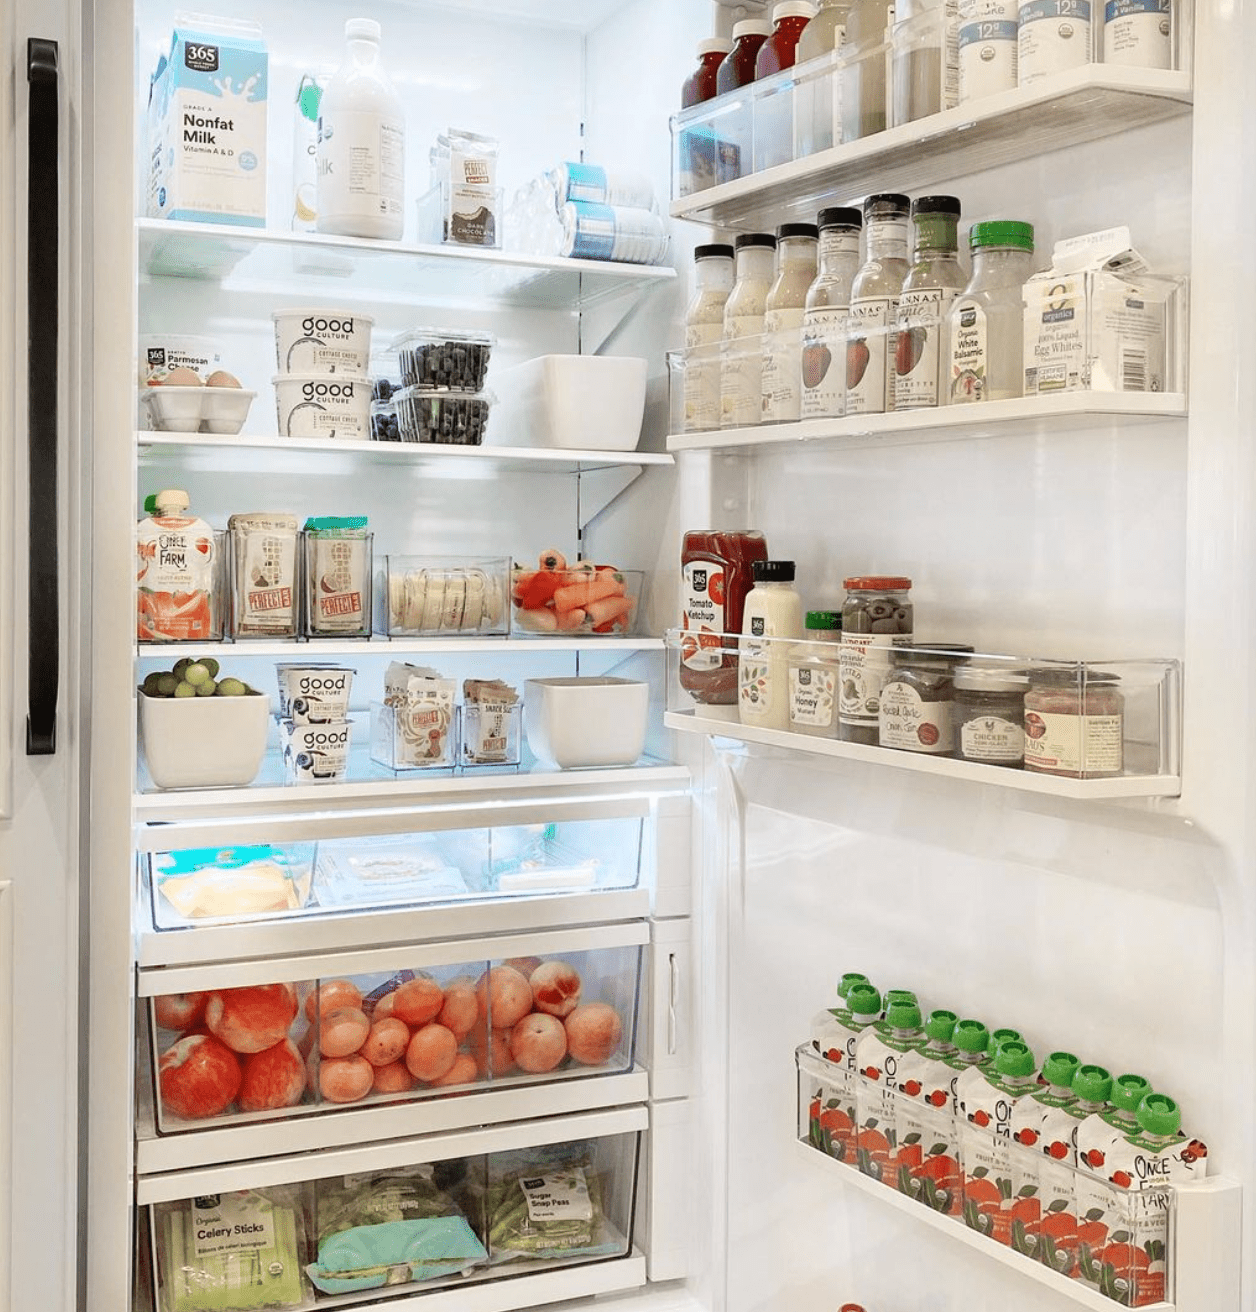
The Strategic Guide on How to Organize a Refrigerator
Your refrigerator isn’t just a cold box; it’s a high-tech appliance with different temperature zones. Understanding this “thermal geography” is the key to mastering how to organize a refrigerator for maximum freshness.
The Door: The Warmest Zone
The door is the warmest part of the fridge due to constant opening and closing. It’s the absolute worst place for perishables like milk and eggs, despite what many fridge designs suggest.
- What to Store Here: Condiments (ketchup, mustard, mayo), jams, pickles, salad dressings, and bottled water or soda. These items are typically high in preservatives like vinegar, salt, and sugar, so they can handle the temperature fluctuations.
The Upper Shelves: The “Ready-to-Eat” Zone
The upper shelves have the most consistent, stable temperatures. This makes them the perfect spot for foods that don’t need to be cooked.
- What to Store Here: Leftovers in clear, airtight containers, drinks, yogurt, cheese, deli meats, and prepared foods like hummus or dips. Storing leftovers here keeps them in your line of sight, reminding you to eat them.
The Lower Shelves: The “Raw Deal” Zone
The back of the bottom shelf is typically the coldest part of your refrigerator. This is the prime real estate for raw ingredients that need to be kept extra cold and contained.
- What to Store Here: Raw meat, poultry, and fish. Crucially, always store these items on the lowest possible shelf, ideally in a sealed container or on a tray. This is a non-negotiable food safety rule. If they leak, the juices won’t drip down and contaminate all the food below. You can also store milk and eggs here for optimal coldness.
The Crisper Drawers: The Humidity Hub
Those drawers at the bottom aren’t just for show. They’re designed to maintain specific humidity levels to keep your produce fresh. Many modern fridges even let you adjust the settings.
“Think of your crisper drawers as mini-ecosystems. One should be high-humidity for things that wilt, like leafy greens and herbs, and the other low-humidity for things that rot, like apples, pears, and avocados.” – Maria Jenkins, professional home organizer and food waste reduction advocate.
- High-Humidity Drawer: This setting closes the vent, trapping moisture inside. It’s perfect for:
- Leafy greens (kale, spinach, lettuce)
- Herbs (parsley, cilantro)
- Broccoli, carrots, green beans, and bell peppers
- Low-Humidity Drawer: This setting opens the vent, allowing ethylene gas to escape. Ethylene is a gas released by some fruits that speeds up ripening and can cause other produce to spoil faster. This drawer is ideal for:
- Apples, pears, and stone fruits (peaches, plums)
- Grapes
- Avocados
Level Up Your Fridge Game: Pro Organization Tips
Once you’ve got the zones down, you can introduce a few tools and habits to maintain your perfectly organized fridge.
- Use Clear Containers: Ditch the opaque takeout boxes. Storing leftovers and prepped ingredients in clear, stackable containers lets you see exactly what you have at a glance.
- Label Everything: A simple roll of masking tape and a marker can be your best friend. Label your leftovers with the contents and the date they were made. No more guessing games.
- Implement “First In, First Out” (FIFO): Just like in a grocery store, when you buy new items, move the older ones to the front. This ensures you use up food before it expires.
- Create an “Eat Me First” Bin: This is a game-changer. Designate a small, open bin for items that are nearing their expiration date or leftovers that need to be eaten soon. It’s a visual cue for the whole family.
- Group Like Items: Use bins or trays to group similar items together. You could have a “yogurt” bin, a “cheese” drawer, or a “snack” station. This prevents smaller items from getting lost in the back.
Frequently Asked Questions (FAQ)
Q: How often should I clean and organize my refrigerator?
A: A deep clean and full reorganization should be done quarterly, or about every three to four months. However, you should wipe up spills immediately and do a quick “tidy up” every week before you go grocery shopping to take stock of what you have.
Q: What is the ideal temperature for a refrigerator?
A: For optimal food safety, your refrigerator should be set at or below 40°F (4°C). Your freezer should be at 0°F (-18°C).
Q: Can I store bread in the refrigerator?
A: It’s generally not recommended. The cold, dry air of a refrigerator can cause bread to go stale much faster. It’s best stored at room temperature or frozen if you need to keep it for a long time.
Q: What’s the best way to store leafy greens to keep them fresh?
A: Wash and thoroughly dry your greens as soon as you get them home. A salad spinner is excellent for this. Then, wrap them loosely in a dry paper towel and place them in a sealed container or a zip-top bag in your high-humidity crisper drawer.
Q: Why does my fridge have a strange smell, and how can I fix it?
A: Odors are usually caused by spoiled food or spills. After a thorough cleaning, you can place an open box of baking soda or a small bowl of activated charcoal on a shelf to absorb lingering smells.
A Fresh Start for Your Kitchen
Taking the time to learn how to organize a refrigerator is more than just a chore; it’s an investment in a more efficient, less wasteful, and healthier lifestyle. By understanding the zones of your fridge and implementing a few simple systems, you transform a cluttered space into a functional hub for your kitchen. So go ahead, open that door with confidence, and enjoy the peace and clarity that comes with a perfectly organized fridge.