Let’s talk about the unsung heroes of our kitchens. We spend weeks, sometimes months, researching the perfect refrigerator—poring over reviews, measuring spaces, and debating stainless steel versus matte black. But once that beautiful appliance is humming away in our home, we often forget about the little components working tirelessly behind the scenes. If you’ve ever noticed a faint, funky smell you just can’t place, it’s time we discussed How To Clean Refrigerator Drip Pan, the secret task that separates a clean kitchen from a truly pristine one.
Think of your fridge’s drip pan as the silent janitor. It’s a shallow tray hidden away, designed to catch condensation from the automatic defrost cycle. While it’s doing its job, this collected water, mixed with dust and ambient kitchen grime, can become a breeding ground for mold, mildew, and some seriously unpleasant odors. Getting it clean is a simple job, but one that makes a world of difference.
What Is a Refrigerator Drip Pan, Anyway?
Before we roll up our sleeves, let’s get acquainted. The refrigerator drip pan is a tray designed to collect and evaporate water produced during your fridge’s defrost cycle. Instead of ice building up on the cooling coils, the system periodically warms up just enough to melt it. That water trickles down a drain line and into this pan, where the warmth from the condenser coils and compressor helps it evaporate back into the air.
It’s a brilliant, self-sustaining system, but it’s not perfect. If the water doesn’t evaporate fast enough, or if dust, pet hair, and food particles find their way in, you’ve got the perfect recipe for a swampy, smelly mess.
Why You Absolutely Need to Clean Your Drip Pan
You might be thinking, “Out of sight, out of mind, right?” Wrong. A neglected drip pan can cause a surprising number of issues. Let’s be real, ignoring it is just asking for trouble.
- The Smell: This is the most common red flag. A musty, moldy, or “rotten” smell that seems to have no source in your kitchen often originates from the stagnant water and bacterial growth in the drip pan.
- Mold and Bacteria: A warm, damp, dark environment is a five-star resort for mold and mildew. These spores can circulate in your kitchen’s air, which isn’t great for your home’s air quality or your health.
- Pest Attraction: Cockroaches, ants, and other pests are drawn to sources of water and organic matter. A dirty drip pan is an open invitation for them to set up camp.
- Potential for Overflow: If the pan gets too gunked up or the drain line clogs, the water can overflow, potentially damaging your floor and the base of the refrigerator itself. This is a crucial part of any good refrigerator maintenance schedule.
First Things First: Locating Your Drip Pan
So, where is this elusive tray? Its location typically depends on the model of your refrigerator. You’ll usually find it in one of two places.
- Behind the Bottom Grille: On many models, especially older ones or those with the freezer on top, the drip pan is located at the very front, behind a removable kickplate or grille at the bottom. This grille often snaps off or is held by a couple of screws.
- On the Back, Near the Compressor: For many modern side-by-side and French door models, the drip pan is fixed to the back of the unit, near the bottom where the compressor is housed. You’ll need to carefully pull your refrigerator away from the wall to access it.
Expert Tip: “Before you start yanking on parts, do a quick search for your refrigerator’s model number online. The user manual or a manufacturer’s diagram will show you exactly where the drip pan is and how to remove it without breaking any plastic clips. It’s a five-minute search that can save you a hundred-dollar headache.” – David Chen, Certified Appliance Repair Technician
How to Clean Refrigerator Drip Pan: The Ultimate Guide
Alright, you’ve found it. Now it’s time for the main event. This process is straightforward, but taking your time and being thorough is key.
Step 1: Safety and Preparation
Before you do anything else, safety comes first. Don’t skip this.
- Unplug the refrigerator. This is non-negotiable. You’ll be working with water near electrical components. Unplug the unit from the wall outlet.
- Gather your supplies. You’ll want some old towels or rags, rubber gloves, a scrub brush or sponge, and your choice of cleaning solution. A flexible bottle brush can also be a lifesaver for cleaning the drain tube.
- Protect your floor. Place old towels on the floor in front of or behind the fridge, depending on where your pan is located. Spills happen!
Step 2: Removing the Drip Pan
Gently slide the pan out. Be careful, as it may be full of nasty water. If it feels stuck, don’t force it. It might be held in by clips or slid into tight grooves. Wiggle it gently to see how it’s secured. For pans on the back of the unit that are non-removable, you’ll have to clean them in place, which is a bit trickier but still manageable with sponges and towels.
Step 3: The Cleaning Process
Take the pan to a sink or bathtub for a deep clean. If it’s really grimy, you might want to do this outside with a hose.
- Empty the contents: Carefully pour out any standing water.
- Initial Rinse: Give the pan a good rinse with hot water to remove any loose debris.
- Scrub with a Cleaner: This is where you banish the gunk. You have a few options for cleaning solutions:
- Warm, Soapy Water: Good old dish soap and a scrub brush work well for light-to-moderate grime.
- White Vinegar Solution: For mold, mildew, and odors, a solution of one part white vinegar and one part warm water is fantastic. Let the pan soak in it for 15-20 minutes before scrubbing.
- Diluted Bleach Solution: For a serious mold situation, a solution of one tablespoon of bleach per gallon of water is a powerful disinfectant. Never mix bleach with other cleaners, especially ammonia. Ensure the area is well-ventilated.
Scrub every corner and crevice of the pan until it’s sparkling clean.
Step 4: Tackling Stubborn Stains and Odors
If stains and odors persist, make a paste of baking soda and water. Apply it to the affected areas, let it sit for 30 minutes, and then scrub again. The mild abrasive quality of the baking soda can lift tough stains and neutralize lingering smells.
Step 5: Drying and Reinstallation
This step is critical. The pan must be completely dry before you put it back. A damp pan will just start the mold-growing cycle all over again. Towel dry it thoroughly, then let it air dry for at least an hour to be sure.
Once it’s bone dry, slide it carefully back into its place. Re-attach the grille if you removed one, and then you can plug your refrigerator back in.
How Often Should You Clean Your Refrigerator Drip Pan?
You should aim to clean your refrigerator drip pan at least twice a year. However, if you live in a very humid climate, have pets that shed a lot, or have a busy kitchen with lots of foot traffic (which kicks up dust), checking it every three months is a smart move.
Sometimes, a full and dirty drip pan is a sign of a bigger issue, like a clogged defrost drain line. While you’re cleaning the pan, it’s a good idea to locate the drain tube opening (usually inside the freezer or fresh food compartment) and make sure it’s clear of ice or food debris.
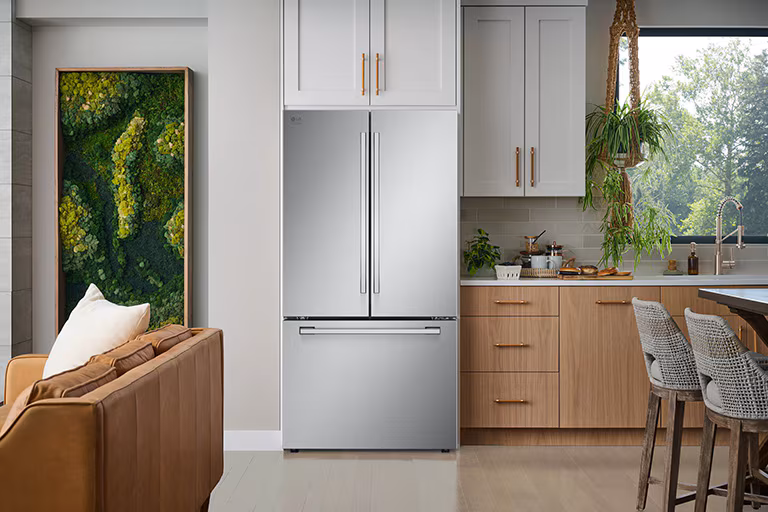
If keeping up with appliance maintenance feels like a constant chore, it might be a sign that your older model is showing its age. Modern refrigerators often feature more advanced designs that can improve refrigerator’s energy efficiency and require less hands-on cleaning. If you feel an upgrade might be on the horizon, exploring the latest models could be a worthwhile investment.
Bảng trống.Frequently Asked Questions
Q: What is the black gunk in my refrigerator drip pan?
A: That black gunk is typically a combination of dust, lint, and mold or mildew that has grown in the stagnant water. It’s a clear sign that the pan is overdue for a cleaning.
Q: Can a dirty refrigerator drip pan make my house smell?
A: Absolutely. A smelly drip pan is one of the most common culprits behind a mysterious “musty” or “funky” odor in the kitchen. Because the pan is often near the condenser fan, those odors can be circulated around the room.
Q: My refrigerator drip pan is always full of water. What’s wrong?
A: While some water is normal, a constantly full or overflowing pan usually indicates a problem. The most likely cause is a clogged defrost drain line, which prevents water from draining properly from the freezer. High humidity can also be a contributing factor.
Q: Is it safe to use bleach to clean the drip pan?
A: Yes, it is safe to use a highly diluted bleach solution (1 tablespoon of bleach per 1 gallon of water) to sanitize the pan and kill mold. However, you must rinse it thoroughly afterward and ensure it’s completely dry before reinstalling it. Never use straight bleach and always work in a ventilated area.
Q: I can’t remove my drip pan. How do I clean it?
A: If your drip pan is fixed in place, you’ll have to clean it where it is. After unplugging the fridge, use a sponge and your chosen cleaning solution to carefully scrub the inside of the pan. Use towels or a wet/dry vac to soak up the dirty water. It’s more tedious, but very doable.
A Fresh Finish
And there you have it. You now know how to clean refrigerator drip pan like a pro. It’s one of those small, ten-minute tasks that pays huge dividends in a cleaner, fresher, and healthier kitchen environment. By adding this simple step to your regular home maintenance routine, you’re not just eliminating odors; you’re extending the life and efficiency of one of the most important appliances in your home. Go on, give your fridge the deep clean it deserves.